


Smooth Plastering Kit 16 m² + VIDEO
Take advantage of the bundle offer and pay less! The bundle includes everything you need to begin your clay plaster wall finishing project.
You can purchase additional clay plaster HERE
Please note that the return policy applies only to the complete bundle.
Take advantage of the bundle offer and pay less! The bundle includes everything you need to begin your clay plaster wall finishing project.
You can purchase additional clay plaster HERE
Please note that the return policy applies only to the complete bundle.

Safe purchase
.svg)
Home delivery

Refund
Single-color plastering of all walls and ceilings with decorative clay plaster is a very beautiful and rapidly growing alternative to conventional wall painting. Today in Lithuania, there are many professional craftsmen who offer this type of finish — but the best part is that anyone who is willing and has the time can truly do it themselves. Read all our recommendations to achieve the best possible results.
Clay plaster adds a great amount of warmth to any space, with soft, subtle shading. We recommend plastering both the walls and the ceilings — this creates an even more impressive and cohesive look.
What is the difference between Light Sand 13 and White Decorative Clay Plaster?
The only difference lies in their base colors: one is light sand–colored, and the other is warm white. When tinted with the same pigments, the shades are very similar.
The biggest difference is that Light Sand 13 dries more slowly during application and creates slightly more shading, making it the most popular mixture currently chosen for finishing large wall and ceiling areas.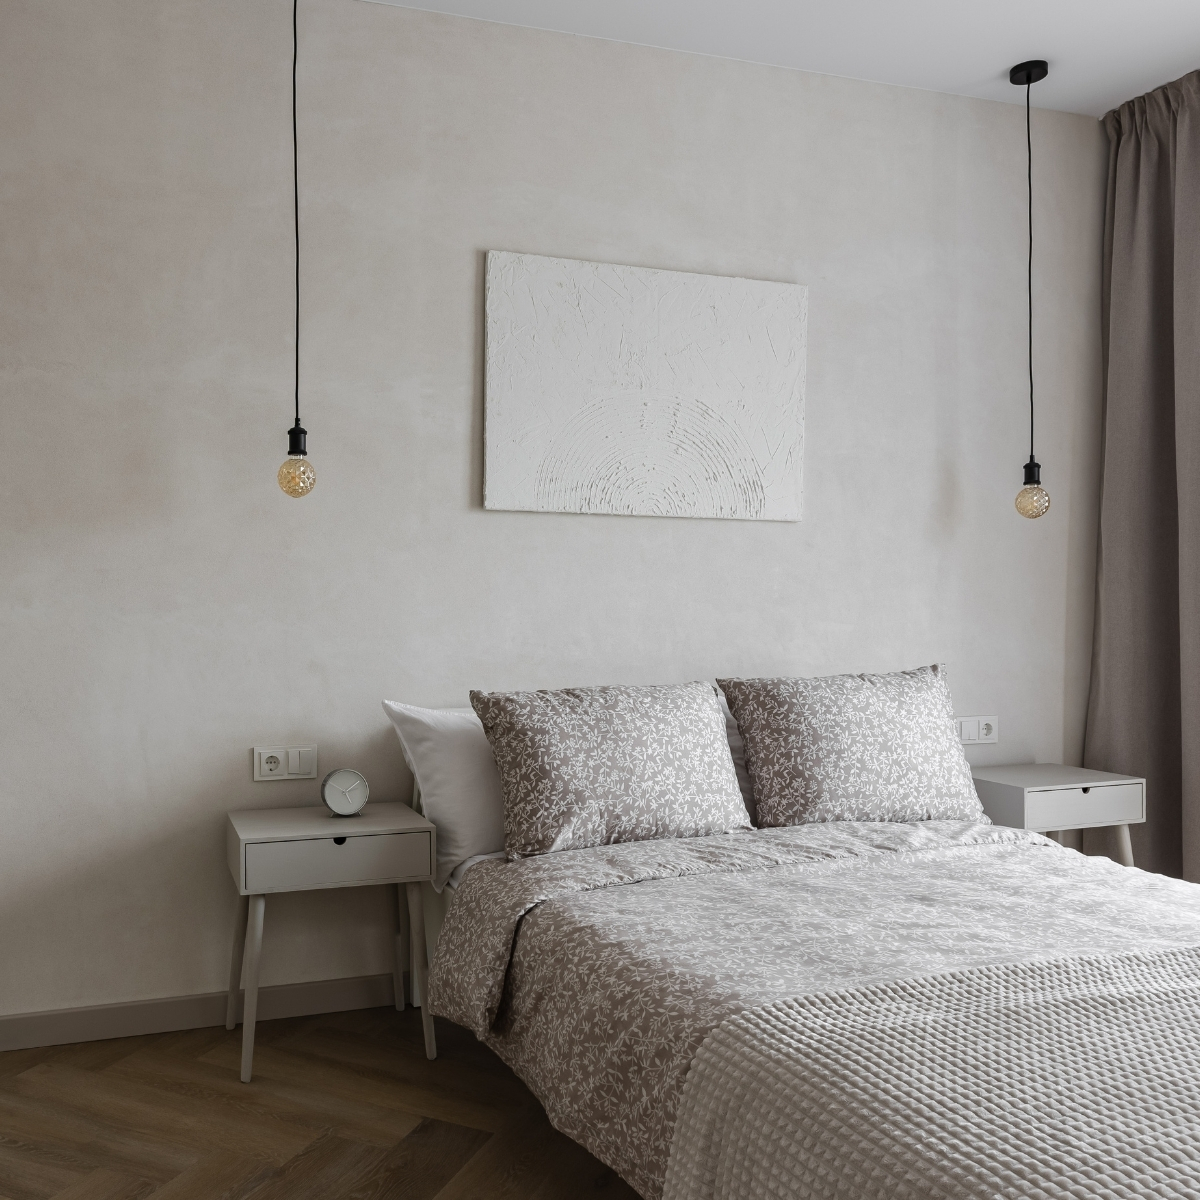
FEATURES
- Free of chemical substances that create a film;
- 100% vapor-permeable;
- Contains no volatile organic compounds (VOCs);
- Antistatic, so it does not attract dust;
- The average pH value of Light Sand 13 clay plaster is about 9.63 — this environment is unfavorable for mold formation, yet not too alkaline to irritate the skin, making clay mixtures safe to handle by hand;
- Clay plaster is non-combustible — fire classification A1;
- For decorative clay plaster wall finishing, thorough surface preparation up to skim-coating level is usually sufficient.
COMPOSITION
A dry mixture of white clay, marble, sand, and cellulose. All components are non-toxic. Mixed with water.
CAN BE APPLIED ON:
- Classic / finishing clay plaster;
- Gypsum / cement / lime plaster;
- Plasterboard;
- Gypsum fiber boards;
- Cement, wood-fiber, and other boards intended for plastering or skim-coating;
- Previously skim-coated and traditionally painted surfaces;
- Stoves and fireplaces coated with classic Mr. Clay clay plaster.
MIX PREPARATION
Pour 9–11 L of water into a container of at least 35 L. Add the full amount of pigment if tinting and mix thoroughly with an electric mixer. Then, while stirring, slowly pour in the entire package of decorative clay plaster. Mix well, cover the container, and allow the mixture to soak for at least 1 hour.
The mixture may look thin at first, but it will thicken later. Mix again before plastering.
The wet mixture appears darker than the dry, finished color.
USAGE TIME OF PREPARED MIX
Keep the prepared clay mixture covered in a cool place. It is recommended to use it within 1–2 weeks.
APPLICATION / TOOLS
Clay plaster can be applied using a trowel, a roller designed for putting on plaster, or mechanically. Apply using stainless-steel trowels with a top handle or standard plastering tools.
For finishing the surface, use tools that match the decorative technique — PVC floats, brushes, sponges, etc.
The choice of tool can significantly affect the final result.
PLASTER THICKNESS
Decorative clay plaster is applied in two very thin layers.
The total thickness is 1–2 mm.
Avoid direct sunlight and drafts during application.
DRYING TIME
Depending on temperature, humidity, and the size of the plastered area, drying may take 4 to 24 hours.
FIRST LAYER APPLICATION
Clay plaster can be applied to the wall with a trowel or with a roller designed for spreading plaster. If two people are working together, it is much easier and faster when one person rolls the plaster onto the wall while the other distributes it with a trowel.
For spreading/applying the mixture, you can use a standard trowel or a trowel with a top handle.
For beginners, it is often easier to work with a trowel that has a handle on the top.
SECOND LAYER APPLICATION
When the first layer of clay plaster has dried, the second layer is applied in the same way. However, this step includes an additional action that creates the beautiful, shaded effect — burnishing the wall with a PVC float. One person applies the second layer, and the other immediately burnishes the entire surface using a PVC float (Marmorino Tools, code 25188).
IMPORTANT!
Clay plaster must be applied very thinly, otherwise it will be impossible to burnish it.
For right-handed users, we recommend starting from the upper left corner. The most comfortable method is to apply in uneven semicircular motions — never in squares or straight vertical/horizontal stripes.
Working in pairs is best. If working alone, we recommend leaving a slightly thicker layer at the edges so the wall dries more slowly and blends better with the freshly applied mixture. Before starting the finishing process, prime the walls with a deep-penetration primer.
MASKING TAPE APPLICATION
To achieve clean inner corners, apply Washi masking tape to the adjacent walls before applying the second layer. Do not stick the tape directly into the corner — leave a 1–2 mm gap, so you don’t accidentally peel off the plaster when removing the tape.
MOST COMMON QUESTIONS
• What if raised waves appear in the first layer?
Remove the excess mixture and apply the plaster thinner — this way, the waves will not appear or will be very minimal.
• What if small scratches appear in the first layer?
Small scratches from marble grains are normal in the first layer. They will be covered in the second layer and will not reappear.
If there are many scratches, the trowel is likely being held too upright — keep the tool flatter and press it more firmly against the wall.
• What if clay plaster doesn’t stick well on outer corners?
Did you apply contact primer on the outer corners? This step is essential.
Also, always trowel from the corner inward, otherwise you may damage the corner.
• Can I stop in the middle of the wall and continue another day?
No. You must finish the wall from corner to corner in one go — otherwise, a visible seam will appear.
BURNISHING OUTER CORNERS IN THE SECOND LAYER
Corners will be cleaner and much stronger if you burnish them with a PVC float (code 25188) during the second layer.
Burnish from the corner toward the inner wall area.
WALL VARNISHING
Clay plaster walls can be left natural or varnished with Mr. Clay Varnish No. 1, a durable water-based varnish.
Read more about varnishing HERE
CREATING FEATURE WALLS
Light Sand 13 clay plaster, like other clay plasters, can be used not only for smooth application but also for decorative techniques.
You can find more decorative instructions HERE


Clay mixtures can be applied to a wide variety of surfaces – whether it’s standard walls, furniture panels, or even a glass vase. The key is proper preparation, so please read our recommendations carefully.
When working with the ClayBeton mixture, it is essential not only to level but also to properly prime the decorated surfaces. Carefully follow all recommendations to achieve a surface that adheres firmly to the base and results in an even, consistent concrete-effect finish.

Single-color plastering of all walls and ceilings with decorative clay plaster is a very beautiful alternative to traditional wall painting. Today in Lithuania, there are many professional craftsmen who offer this type of finish, but the best part is that anyone who is willing and has the time can truly do it themselves. Read all our recommendations to achieve the best possible results.